Basic Movement of the Hand
This is an exercise for learning the right movement of the hand:
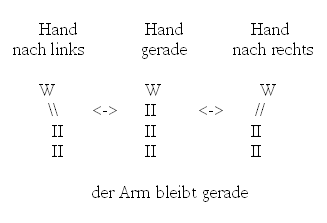
Lay your forearm and hand onto a desk. You can use a book to raise your forearm a little bit, which produces an even more relaxed position of the hand.
Now move your hand from the wrist to the left and to the right, and watch the hand move to the left and to the right. The forarm keeps straight, if you want you can hold it with your left hand to prevent it from moving.
This movement is a bit unusual at the beginning, so this exercise is a way to practice the movement from the wrist.
You can also make this exercise without a table. Just hold your right forearm with your left hand, and move your right hand from the wrist to the left and right.

This movement will be used to play the mandolin.
First picking exercises
Many of the old mandolin methods start from the beginning with the tremolo or the up- and down movement. I think this is a good way to lear the picking movement. If you just play downstrokes like in the modern German methods the hand has to do an up movement anyway between two down strokes. I think that it is important, that the movement of the hand is done in the right way from the beginning.
Downstroke: The hand moves on straight line from a distance above the strings, diving through the plane of the strings in directon of the mandolin table. The pick hits a string and moves on until it is stopped by the next string. The taget of your movement shold be the stopping string, not the string that you actually play. After the picking movement tha hand should rest with its weight on the next string until it moves again for an upstroke or the next downstroke.
Upstroke: The hand moves back on the same straight line, away from the mandolin table. While the hand moves up it will hit the lower string again, caused by the slanted movement only one string of the double strings is hit. The movement continues until it reaches the place for a new downstroke.
In my opinion it is good to make large movements in the beginning. This will make it easier to control the right movement. And it will produce a loud and clear sound. As soon as you play faster the movements will get smaller.
If you try to make small movements you will not be able to produce a loud and clear sound with your mandolin.
The movement for the down- and upstrokes should be similar to what I described above. The movement should come from the wrist. In my opinion this straight movement up and down, along a slanted line, with a downstroke hitting (and resting) on the next string, and a big upstroke is the basic movement on the mandolin.
Don Julin Instruction Video
Description by Zarh M. Bickford
You can find a detailed description of the movement in the first volume of the mandolin method by Zarh M. Bickford, which is available as a free download at the internet archive. Here are the most important descriptions from the Bickford Method:
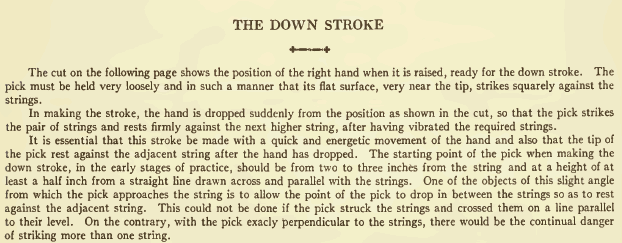
THE DOWN STROKEThe cut on the following page shows the position of the right hand when it is raised, ready for the down stroke. The pick must be held very loosely and in such a manner that its flat surface, very near the tip, strikes squarely against the strings. In making the stroke, the hand is dropped suddenly from the position as shown in the cut, so that the pick strikes the pair of strings and rests firmly against the next higher string, after having vibrated the required strings. It is essential that this stroke be made with a quick and energetic movement of the hand and also that the tip of the pick rest against the adjacent string after the hand has dropped. The starting point of the pick when making the down stroke, in the early stages of practice, should be from two to three inches from the string and at a height of at least a half inch from a straight line drawn across and parallel with the strings. One of the objects of this slight angle from which the pick approaches the string is to allow the point of the pick to drop in between the strings so as to rest against the adjacent string. This could not be done if the pick struck the strings and crossed them on a line parallel to their level. On the contrary, with the pick exacly perpendicular to the strings, there would be the continual danger of striking more than one string. In order to make the down stroke in this manner it is necessary to tilt the hand very slightly away from the body so that the pick points a very little toward the body, instead of being exactly perpendicular. Another important feature of the stroke is that, while the little finger is raised with the rest of the hand as the stroke starts, it goes down with the hand so that the back of the nail touches the guardplate as the pick rests against the next string. It is also important that both pick and little finger remain at their respective resting places, with the hand and arm entirely relaxed, until the hand is brought back, just in time for the next down stroke. When the down stroke is made on the first string (E), since there is no higher string for the pick to rest against, the little finger and even the knuckles of the second and third fingers are used to stop the downward swing of the hand.The point of the pick should never touch the guardplate or top of the instrument, it being stopped in mid-air at a point no farther from the E string than this string is from the A string. |
 |
| As previously explained, the back of the nail, or more properly, the side or outer corner of it, should be allowed to rest against the guardplate or top of the instrument as the hand drops toward the strings for the down stroke, and, during the early stages of practice, this finger should leave the top of the instrument when the hand is brought back to its starting point, ready for another down stroke. As the speed of the strokes increases, however, and the length slightly decreases, this finger does not leave the top, but glides back and forth easily, following the motion of the hand. In this connection, Munier, the great Italian authority, says: “The other fingers of the right hand (aside from the thumb and first finger) should be relaxed; the little finger should glide on the sounding-board and serves as a guide for making the tremolo.” Tartaglia another eminent authority, also says: “The little finger should not be stuck fast to the soundingboard, but it must glide easily, following the movement of the hand.” Pictrapertosa, the famous authority of Paris, also says: “… the little finger resting on the guardplate, but without force, for this finger, moving along the top, acts as a guide to the hand in the movement of the pick against the strings.”
It has been the experience of the author that a very light contact of the little finger with the instrument serves as a guide for the movement of the hand, both in single strokes and in the tremolo. The single exception, when its touching might be a matter of choice, is when playing two or more strings with the tremolo, as in “duo” playing. While on the subject of down and up strokes, it should be added that the wrist joint does not move in the least when making |
 |
| After having allowed the pick to rest for an instant, with all muscles perfectly relaxed, the hand and pick are brought back with a quick motion to the exact point from which the down stroke was started and following the very same angle or imaginary “groove,” but touching the strings on this upward journey, the same as when the hand went down. If the pick is “held very loosely, both strings of the pair will be vibrated when taking the up stroke, since the point of the pick will glide quickly across them, the same as on the down stroke. It is most essential that the directions for using the very point of the pick be carefully followed, especially in taking the up stroke and also that the pick merely rest between the thumb and finger instead of being gripped, otherwise the slight angle at which it is held will cause it to slip under the first string encountered.
This is disastrous, as it not only prevents striking both strings, but causes the pick to get caught under the string so that the stroke cannot be finished without an accident of some sort. |
| Should the second of the pair of strings occasionally be missed on the up stroke, it need cause no concern, since the two strings are always to be considered as one, and the missing of one of the pair is partly compensated by the fact that if the strings are perfectly in tune, the second will vibrate in s}mpathy with the first, and also by the fact that up strokes are, as a general rule, on unaccented or rhythmically less important notes than the down strokes. Many of the greatest virtuosos, soloists and authorities, both in this country and in Europe openly advocate the striking of but a single string on the up stroke. The author would suggest, however, the above method as being most nearly ideal.
When the tremolo on two or more strings is studied, the pick must necessarily strike both strings of the pair on the up as well as the down stroke, but the slight angle at which the pick is held for work on single strings ceases to be necessary at that time, since it would be inconvenient to always rest the pick against an adjacent string. |
Short description from a tenor banjo method
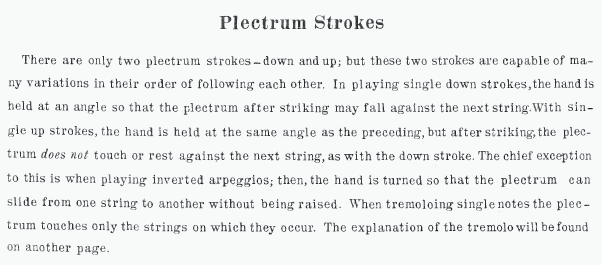
In other words – from Paramount Method for Tenor Banjo by WM. Foden copyright 1922 (also available in the internet archive)


